Create real water effects with Flash CS4 & ActionScript 3.0
by 2 June, 2009 1:00 pm39
In this Flash CS4 tutorial you will learn a advanced technique called perlinNoise to create a realistic water effect into any image. We will show you how to apply it in two different situations, one in a river, creating the water effect in whole image, and the other one in a waterfall using a more complex process as it will reproduce the effect in a specific area.
Final Result:
Before Start:
This example will use some advanced action script elements like displacementMapFilter, perlinNoise and bitmapData from Action Script.
The perlinNoise filter is one of the most versatile filters, normally used to give some realism to animation but also one of the more complicated to work with, i will not explain how-to work with him, for that you have the very good documentation following the links:
In my tutorial i will use Flash CS4, but the things are similar on previous CS versions.
Requirements
You should have a installed version of Flash CS 4 (or previous CS 2/3 versions)
Have the 3 images distributed within the images.zip file
Pre-Requesites
Understand some of the basic concepts of working with bitmaps and bitmap data. Read the links written in “Before Start“.
Some imagination to produce your water effects.
Step 0 – Create a new Flash Project
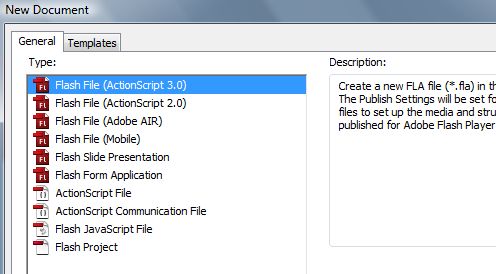
Open Flash CS4 and create a new Flash (Action Script 3) project.
Step 1 – Creating first example
Import the image “water.jpg” into the stage.
Goto menu File->Import->Import into stage and select our water.jpg image (distributed in images.zip file)
The image is automatically placed into the stage, just center it on your screen, like the bellow example.

Name the actual layer to image. To do this, double click on the Layer 1 name, and change it.
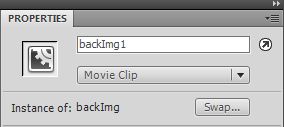
Next, we need to transform our image to a movieclip to receive the filter/water effect, just click on the image on stage, and then right click on it; select Convert to symbol, name it backImg. Without doing anything, go to the panel properties, and write the instance name to backImg1
:
Step 2 – Create a layer for actions
Click on the new layer button (like the following image, on yellow) and name it actions.

You should now have two separated layers:

Step 3 – Lets write some code
This is where the tutorial can become a bit complicated to understand, but i will explain line by line. For now select the layer actions, and click F9 key on keyboard, actions panel will now open, just write this code on it:
var bm:BitmapData=new BitmapData(backImg1.width, backImg1.height);
var disp:DisplacementMapFilter = new DisplacementMapFilter(bm,new Point(0,0),1,2,10,60);
var pt1:Point = new Point(0,0);
var pt2:Point = new Point(0,0);
var perlinOffset:Array = [pt1, pt2];

addEventListener(Event.ENTER_FRAME, onFrame);
function onFrame(evt:Event):void {
  perlinOffset[0].x +=1;
  perlinOffset[1].y +=0.1;
  bm.perlinNoise(45,9,2,50,true,false, 7,true,perlinOffset);
  backImg1.filters=[disp];
}
Simple code, but powerful animation, just run the project
Step 4 – Understand the code
The first two lines are the main declaration for the effect operation, e create a new BitmapData with the same dimensions of image “water” movieclip:
var bm:BitmapData=new BitmapData(backImg1.width, backImg1.height);
then, we instantiate the DisplacementMapFilter with our BitmapData (bm), the starting map point (0,0), the starting x and y (1,2) and the scaling factors x, and y. (10,60).
The following lines:
var pt1:Point = new Point(0,0);
var pt2:Point = new Point(0,0);
var perlinOffset:Array = [pt1, pt2];
Are the base points to be used to move the perlinNoise effect, these are defining the perlinOffset
We now add the EventListner to repeat the position of filter and provide us a real time animation, because the application speed is 25 frames per second (default, you can change this on main stage properties) we have to ‘replace’ the perlinNoise and displacement filter with a new one with some minor changes to the perlinNoise offset, that will result in a soft animation of the perlinNoise map.
addEventListener(Event.ENTER_FRAME, onFrame);
Now the handler, and the main effect (his core):
function onFrame(evt:Event):void {
perlinOffset[0].x +=1;
perlinOffset[1].y +=0.1;
bm.perlinNoise(45,9,2,50,true,false, 7,true,perlinOffset)
backImg1.filters=[disp];
}
Here, in every enter frame event we adjust the position (offset) of our perlinNoise, this will produce a smooth and cool move animation.:
perlinOffset[0].x +=1;
perlinOffset[1].y +=0.1;
Play with these values to change direction of the map movement
We now rebuilt the perlinNoise of our bitmapData:
bm.perlinNoise(45,9,2,50,true,false, 7,true,perlinOffset)
On perlinNoise we have some parameters, just play with them but take care with the third parameter (number of octaves) these are the number of perlinNoise “copies”, they are re samples and re sized parts of the perlinNoise effect, useful to improve the realistic effect. Bigger the value, bigger the memory use. Can see full PerlinNoise parameters here.
And finally we re-apply he filter:
backImg1.filters=[disp];
Well… that’s it! Run the project!
Step 5 – Creating a waterfall example
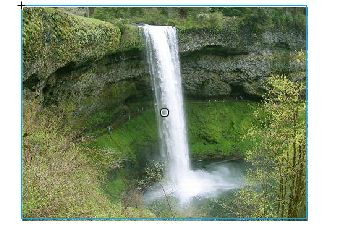
In the following steps we will create a waterfall effect, grab my waterfall image by saving bellow image.

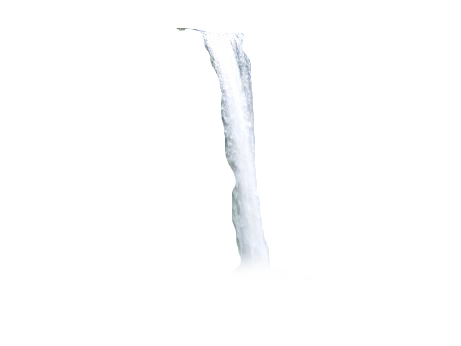
The unique thing that we need to apply in the perlinNoise filter is the “falling water” right? (if we apply to all image, will get a mess up!) Well we need to create a copy only of the water (not very precise, to do that open for example the photoshop and with lasso tool create a second layer only with the water falling, i will not covering it as it is not the aim of this article), just grab my already separated elements:
back.png

and fall2.png
Step 5.1. – Place both images on place
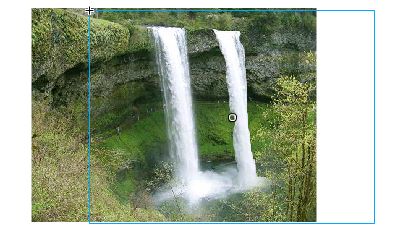
Create two layers (as shown previously) between the image and actions layers. Move our previous water image to the top of stage and put on the new bottom layer the back.png and on the top new layer put the fall2.png, put them at the same position so they became only one image. The waterfall needs to be the top of the other at the correct position, avoid this:
incorrect
correct
Convert them to movie clips, one called back and the other waterfall, name both instances (parameters window) with respective waterfall and back names (Very important), then we just need to repeat the same actions but with the water movie clip, as shown on the following code.
Step 5.2. – Write some more code!
Just add this code to layer actions, on top:
var bm2:BitmapData=new BitmapData(waterfall.width, waterfall.height);
var disp2:DisplacementMapFilter = new DisplacementMapFilter(bm2,new Point(0,0),1,2,10,60);

var pt3:Point = new Point(0,0);
var pt4:Point = new Point(0,0);
var perlinOffsetFall:Array = [pt3, pt3];
and in the function onFrame()
perlinOffsetFall[0].y -=1;
perlinOffsetFall[1].x -=0.1;

bm2.perlinNoise(20,10,1,99,true,false, 7,false,perlinOffsetFall);
waterfall.filters=[disp2];
Well, is done! In this second example, the perlinNoise is applied only to the waterfall image, and is moving down according to y axis, as the code demonstrate:
perlinOffsetFall[0].y -=1;
perlinOffsetFall[1].x -=0.1;
Step 5.3. – Final code and notes!
Now you can see the full code, and notice that you need few lines to create this cool effect.
/** WATER CODE **/
var bm:BitmapData=new BitmapData(backImg1.width, backImg1.height);
var disp:DisplacementMapFilter = new DisplacementMapFilter(bm,new Point(0,0),1,2,10,60);

var pt1:Point = new Point(0,0);
var pt2:Point = new Point(0,0);
var perlinOffset:Array = [pt1, pt2];

/** WATERFALL CODE **/
var bm2:BitmapData=new BitmapData(waterfall.width, waterfall.height);
var disp2:DisplacementMapFilter = new DisplacementMapFilter(bm2,new Point(0,0),1,2,10,60);

var pt3:Point = new Point(0,0);
var pt4:Point = new Point(0,0);
var perlinOffsetFall:Array = [pt3, pt3];

addEventListener(Event.ENTER_FRAME, onFrame);

function onFrame(evt:Event):void {
/*water perlin noise */
perlinOffset[0].x +=1;
perlinOffset[1].y +=0.1;
bm.perlinNoise(45,9,2,50,true,false, 7,true,perlinOffset);
backImg1.filters=[disp]

/*water fall perlin noise, moved by y, creating the fall effect */
perlinOffsetFall[0].y -=1;
perlinOffsetFall[1].x -=0.1;

bm2.perlinNoise(20,10,1,99,true,false, 7,false,perlinOffsetFall);
waterfall.filters=[disp2]

}
Run the project! Nice ah?
Now make your own experiments and show the result to the world! We would love to see it.


