Create Random Torn Photos with Actionscript 3.0
by 10 June, 2009 1:00 pm6
One of the most powerful sets of classes in ActionScript 3 revolve around BitmapData and pixel manipulation.
In this tutorial we are going to look at dynamically creating a photo with torn edges by compositing several images together.
Requirements
I created this tutorial using Flash Builder 4 Beta but you can easily use Flex Builder 3 or Flash CS 3/4.
Pre-Requesites
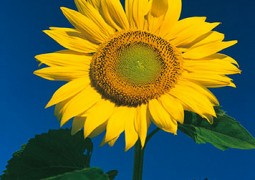
You will need to download the PSD file as well as the folder of images included in the source files package. You should also have a basic understanding of the Bitmap, BitmapData, and the Loader class. I will explain in each step what is going on so if you have never used the Bitmap or BitmapData class you should be fine. Here is an example of what we will end up with, refresh this tutorial to see different masks:
Before we get started lets take a moment to discuss exactly what we are going to do:
- We will need to load in our photo.
- Then we need to load in our supporting images: an alpha mask, image texture, and edges mask.
- We will copy over the BitmapData of our photo using the alpha mask to cut out an image with transparent edges.
- Add 3 layers of the texture image with a blend mode set to multiply.
- Cut out edges from our texture using the edges mask image.
- Rinse and repeat.
Now that we have a plan, lets get started!
Step 1: Creating A Preloader
We are going to set up a simple preloader since each image we generate is comprised of several “layers”. Create a new project called TornImageDemo and open up the Doc Class.
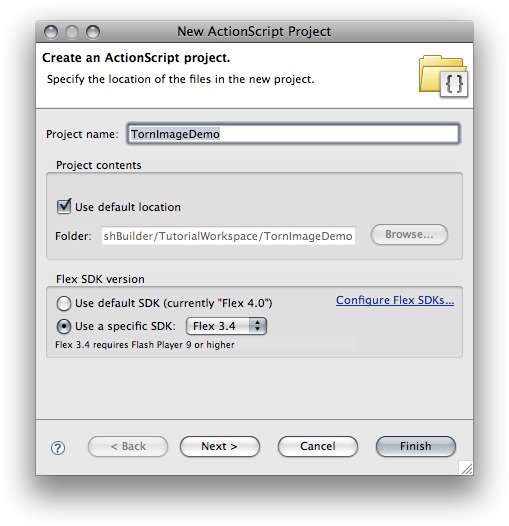
Lets use the following code in the Doc Class:
package
{
	import flash.display.Bitmap;
	import flash.display.Loader;
	import flash.display.Sprite;
	import flash.display.StageAlign;
	import flash.display.StageScaleMode;
	import flash.events.Event;
	import flash.events.IOErrorEvent;
	import flash.net.URLRequest;
	import flash.system.LoaderContext;
	import flash.utils.Dictionary;

	[SWF( backgroundColor="#B5AA97", framerate="31" )]
	/**
	 * @author Jesse Freeman aka @theFlashBum | http://jessefreeman.com
	 */
	public class TornImageDemo extends Sprite
	{

		private static const PHOTO : String = "photo";
		private static const MASK : String = "mask";
		private static const TEXTURE : String = "texture";
		private static const EDGES_MASK : String = "edges_mask";
		private static const BASE_URL : String = "images";
		private var loader : Loader = new Loader( );
		private var currentlyLoading : Object;
		private var preloadList : Array = new Array( {name:MASK, src:"photo_mask.png"}, {name:PHOTO, src:"photo.jpg"}, {name:TEXTURE, src:"photo_texture.jpg"}, {name:EDGES_MASK, src: "photo_edges_mask.png"} );
		private var layers : Dictionary = new Dictionary( true );
		private var context : LoaderContext;
		private var skinPath:String;

		public function TornImageDemo()
		{
			stage.scaleMode = StageScaleMode.NO_SCALE;
			stage.align = StageAlign.TOP_LEFT;

			context = new LoaderContext( );
			context.checkPolicyFile = true;

			skinPath = "/skin1/";
			preload( );
		}

		/**
		 * Handles preloading our images. Checks to see how many are left then
		 * calls loadNext or compositeImage.
		 */
		protected function preload() : void
		{
			if (preloadList.length == 0)
			{
				init( );
			}
			else
			{
				loadNext( );
			}
		}

		/**
		 * Loads the next item in the prelaodList
		 */
		private function loadNext() : void
		{
			currentlyLoading = preloadList.shift( );
			loader.contentLoaderInfo.addEventListener( Event.COMPLETE, onLoad );
			loader.contentLoaderInfo.addEventListener( IOErrorEvent.IO_ERROR, onError );

			loader.load( new URLRequest( BASE_URL + skinPath + currentlyLoading.src ), context );
		}

		private function onError(event : IOErrorEvent) : void
		{
			trace("IOErrorEvent", event );
			preload();
		}

		/**
		 * Handles onLoad, saves the BitmapData then calls preload
		 */
		private function onLoad(event : Event) : void
		{
			loader.contentLoaderInfo.removeEventListener( Event.COMPLETE, onLoad );

			layers[currentlyLoading.name] = Bitmap( event.target.content ).bitmapData;

			currentlyLoading = null;

			preload( );
		}

		private function init():void
		{
			// Need to do something here
		}

	}
}
As you can see we are creating a simple “loop” through our preload, load and onLoad methods. We have also setup an array that contains each of our images we will preload. After setting up the stage we call the preload method and check the length of our preload array. If there is an item in the array we call load and begin loading it. Once it is loaded we save it to a dictionary then recall preload. Once preloading is done we call init and are ready to go. Lets talk about each of the images we are going to load.
Step 2: Creating the Image Mask Template
Lets open the PSD you downloaded in the Pre-Requesists part of this tutorial.
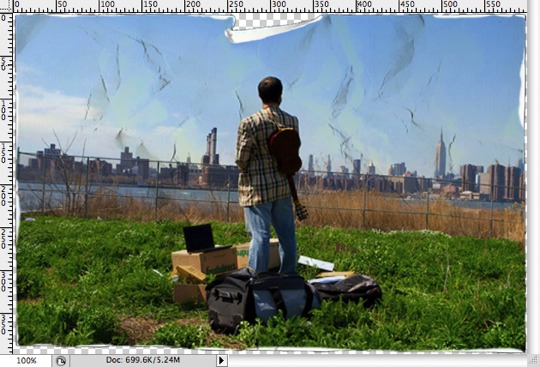
As you can see I have set this up to show you what our end result will look like in Flash. If you check the layer comps you will see how each layer of the photo will need to be exported.
Lets talk about what each layer does:
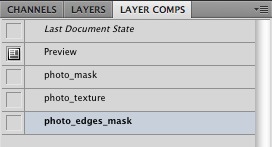
- Preview represents what the image will look like in flash when we apply the masks and textures. You do not need to export this.
- Photo Mask represents the alpha mask we will be using to “cut” out transparent edges from photo. Alphas masks work just like regular masks except you use them when calling copyPixels on BitmapData.
- Texture represents the actual photo texture we will be using to add some detail to our photo. The texture is also where we will get our edges from when using the edge mask
- Edges Mask represents another alpha mask that we’ll use to cut out the edges around the photo. Edges represent any folded over pieces of paper or small tears around the edge of the image.
We will need to save out these layers and put them in our project. The Mask and Edge Mask should be PNG-24s and the Texture can be a JPEG. The images zip (you should have downloaded in the pre-requesites section) has an images folder that contains all of our outputted images for this template along with 2 others so we can randomize the mask we apply to the image. Here are some screen I took when creating this template showing you my file settings:
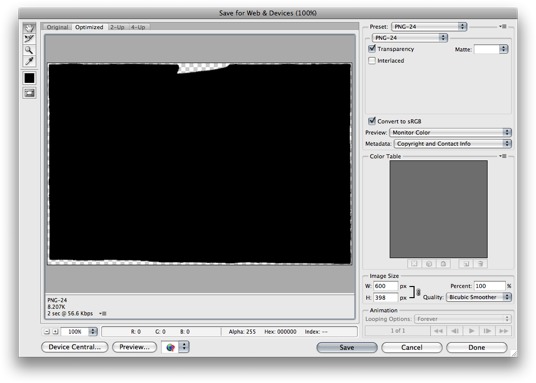
This is the photo mask as a PNG-24.
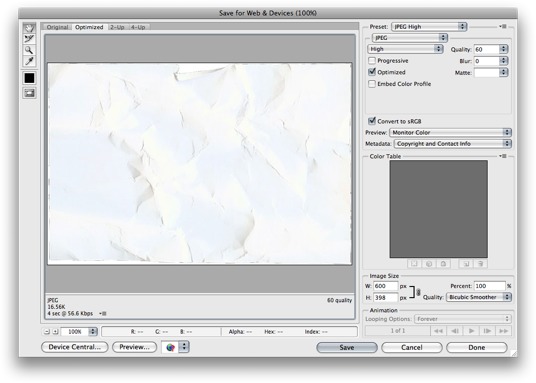 This is the photo texture saved out as a JPEG. Notice how it is not transparent? This is because we will use the above alpha mask to cut out the parts of the image we don’t need.
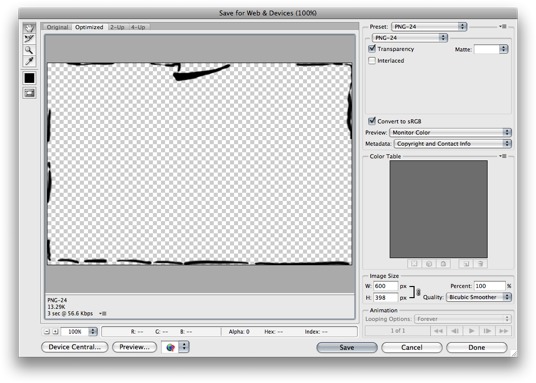
Our final image is the edges mask. This is similar to our photo mask and should be a PNG-24. Once you unzip the images file, move it into your bin-debug folder or wherever you compile your final SWF. As you can see I have broken up each folder into skinX and in each set is a photo_mask.png, photo_edges_mask.png,a photo.jpg and photo_texture.jpg.
Step 3: Applying the layers
At this point we have hardcoded our class to load in mask skin1. Do a quick build and check your browser connections to make sure the photo, mask, edges mask and texture are correctly loading.

Sometimes you have to play around with the local security settings of the Flash Player to enable local file access to the images. Likewise it is important to have full security access to these images when running this from a server them since we will be manipulating their BitmapData. Making sure you have a cross domain file is key when deploying these types of projects. Now that everything is loading lets add the following method:
/**
 * Composite image
 */
private function compositeImage() : void
{
	// Create Bitmap data for final image
	var bmd : BitmapData = new BitmapData( layers[PHOTO].width, layers[PHOTO].height, true, 0xffffff );

	// Get width and height for cutting out image
	var rect : Rectangle = new Rectangle( 0, 0, layers[PHOTO].width, layers[PHOTO].height );
	var pt : Point = new Point( 0, 0 );

	// This is our container while we apply the texture
	var imageComposite : BitmapData = new BitmapData( layers[PHOTO].width, layers[PHOTO].height, true, 0xffffff );

	// Copy pixel data from the photo over to the container using the layers[MASK] to cut out the shape
	imageComposite.copyPixels( layers[PHOTO], rect, pt, layers[MASK], null, true );

	if(layers[TEXTURE])
	{
		// Draw on top of container with the texture and apply Darken + Multiply blend modes
		imageComposite.draw( layers[TEXTURE], null, null, BlendMode.MULTIPLY, null, true );
		imageComposite.draw( layers[TEXTURE], null, null, BlendMode.MULTIPLY, null, true );
		imageComposite.draw( layers[TEXTURE], null, null, BlendMode.MULTIPLY, null, false );
	}

	if(layers[EDGES_MASK])
	{
		// Copy the edges on top of the the entire composited image
		imageComposite.copyPixels( layers[TEXTURE], rect, pt, layers[EDGES_MASK], null, true );
	}

	// Copy over the composite image to the BitmapData using the mask to cut out it's shape
	bmd.copyPixels( imageComposite, rect, pt, layers[MASK], null, true );

	// Create Bitamp to test display and add to stage
	var finalImage : Bitmap = new Bitmap( bmd );
	addChild( finalImage );
	finalImage.x = 50;
	finalImage.y = 50;
}
You will also need to import the following classes:
import flash.display.BitmapData;
import flash.display.BlendMode;
import flash.geom.Point;
import flash.geom.Rectangle;
Finally add the following method call to our init method:
compositeImage();
Now if you do a compile you should see the following image:
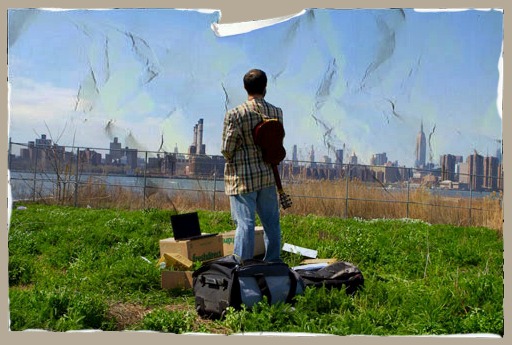
Lets talk about what is going on under the hood of compositeImage. As you can see we are pulling each image out from the dictionary, and either copying out or drawing over the BitmapData if our main photo. Lets go over a few of the main actions going on here: First we need to set a temporary bitmap to store our composite image in.
// This is our container while we apply the texture
var imageComposite : BitmapData = new BitmapData( layers[PHOTO].width, layers[PHOTO].height, true, 0xffffff );
Next we will copy over the photo’s Bitmap Data using the photo_mask.png as an alpha mask. As I mentioned earlier this acts just like a mask and insures that the BitmapData we copy over has transparent edges.
// Copy pixel data from the photo over to the container using the layers[MASK] to cut out the shape
imageComposite.copyPixels( layers[PHOTO], rect, pt, layers[MASK], null, true );
Once we have a foundation of our photo we can apply the texture. Here we multiply the texture 3 times to our image to create a little depth and fill in the wrinkles of the photo.
if(layers[TEXTURE])
{
	// Draw on top of container with the texture and apply Darken + Multiply blend modes
	imageComposite.draw( layers[TEXTURE], null, null, BlendMode.MULTIPLY, null, true );
	imageComposite.draw( layers[TEXTURE], null, null, BlendMode.MULTIPLY, null, true );
	imageComposite.draw( layers[TEXTURE], null, null, BlendMode.MULTIPLY, null, false );
}
Finally we can create our edges by applying an alpha mask to the texture image and using copyPixels to back on top of our
if(layers[EDGES_MASK])
{
	// Copy the edges on top of the the entire composited image
	imageComposite.copyPixels( layers[TEXTURE], rect, pt, layers[EDGES_MASK], null, true );
}
Now with the compositing done we can copy over the imageComposite BitmapData to a clean BitmapData instance using the alpha mask one last time to clean up any transparency we want to preserve.
// Copy over the composite image to the BitmapData using the mask to cut out it's shape
bmd.copyPixels( imageComposite, rect, pt, layers[MASK], null, true );

// Create Bitamp to test display and add to stage
var finalImage : Bitmap = new Bitmap( bmd );
addChild( finalImage );
All done, see how easy this is. Of course I am sure this can be optimized even further but for the purposes of this quick example the effect works perfectly.
Step 4: Randomize
Since we know we have 6 sets of skins (in our images folder) it is really easy to randomize how our photo gets rendered. Simply replace the following line in our TornImageDemo constructor:
skinPath = "/skin1";
with the following:
skinPath = "/skin"+Math.round(Math.random()*5+1)+"/";
Now when you recompile and hit refresh a random number is added to our skin folder.
Conclusion
As you have seen, using Alpha Masks when copying pixel data is an incredibly easy technique to use. To give you an idea of how much file size this technique saves us let take a quick look at how big a PNG-24 from PhotoShop would be.
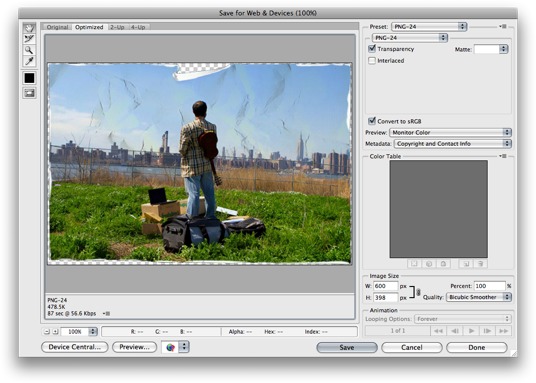
The above image from PhotoShop came out to 478k

This image was dynamically created from the following images:
- photo_edges_mask.png – 16k
- photo_mask.png – 12k
- photo_texture.jpg – 20k
- photo.jpg – 56k
- total – 104k
As you can see, even though we have loaded up 4 times as many images as the PhotoShop PNG, we have actually saved 374k. Also we can now apply this effect to any number of images on the fly verses creating a transparent PNG each time by hand. I hope you enjoyed this simple tutorial and I would love to see how you use it in your next project. Feel free to leave a comment with a link to what you have done.

