Beginners Guide To User Interface Design in C#
by 1 March, 2011 2:18 pm4
User Interface Design in C# Windows Form Application From Scratch
In this C Sharp tutorial you will learn user interface design in C# application. This step-by-step tutorial will help you deeply understand the basic building concept of user interface design in C# application. You will learn to use different types of GUI controls in C# Windows form-based application.
Requirements For User Interface Design in C#
Pre-Requisites
You must be familiar with the basic syntax of C# language. Here are the steps. I have also uploaded the screenshots for your better understanding.
Step 1: Choose New Project in Visual Studio
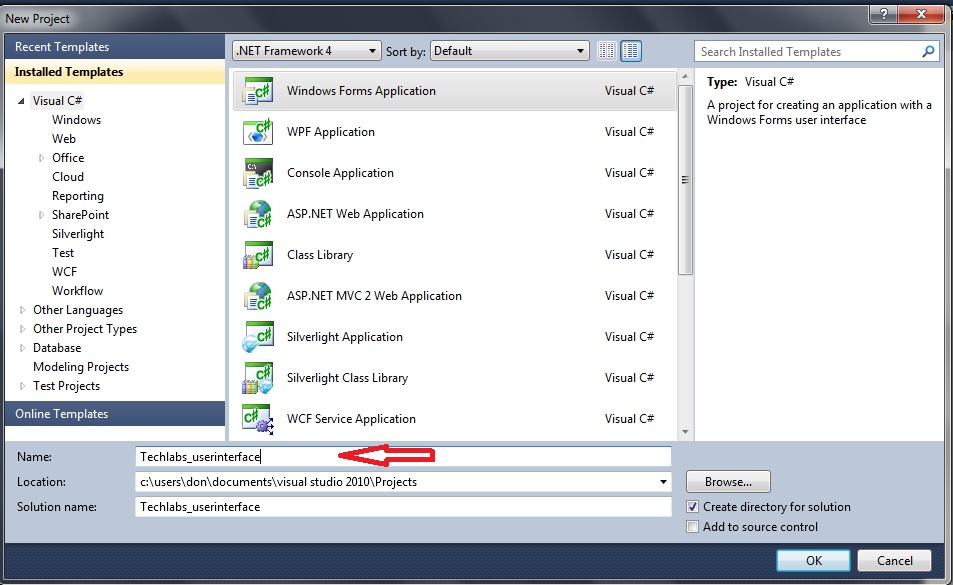
Open Visual Studio 2010. Click on New Project. Choose the project category “C# Windows Form Application”. At the bottom you can rename your application. As you can see I have renamed it to “techlab_userinterface”. Then click Ok.
Step2: Changing The Form Name
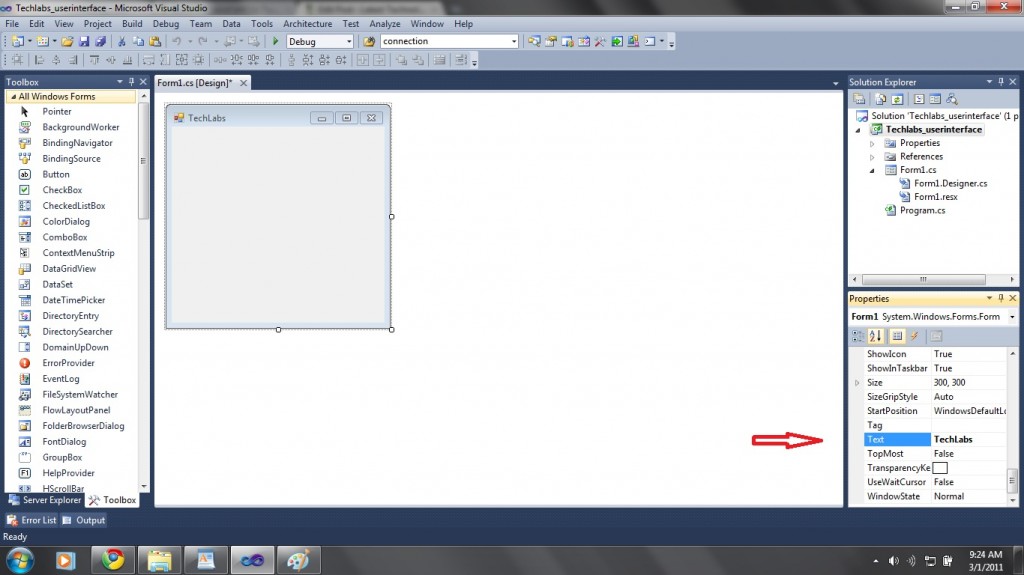
After clicking Ok, you will see a blank form. First of all if you want to change your Form Name, go to the properties window and Find “Text“. Change it to what ever you want. I changed it to “TechLabs“. On Left Side you will see the Toolbars windows. Today we will learn to use some of these basic controls. If you are not viewing these toolbars then you can enable them from View->Toolbox.
Step 3: Dragging Controls On The Form
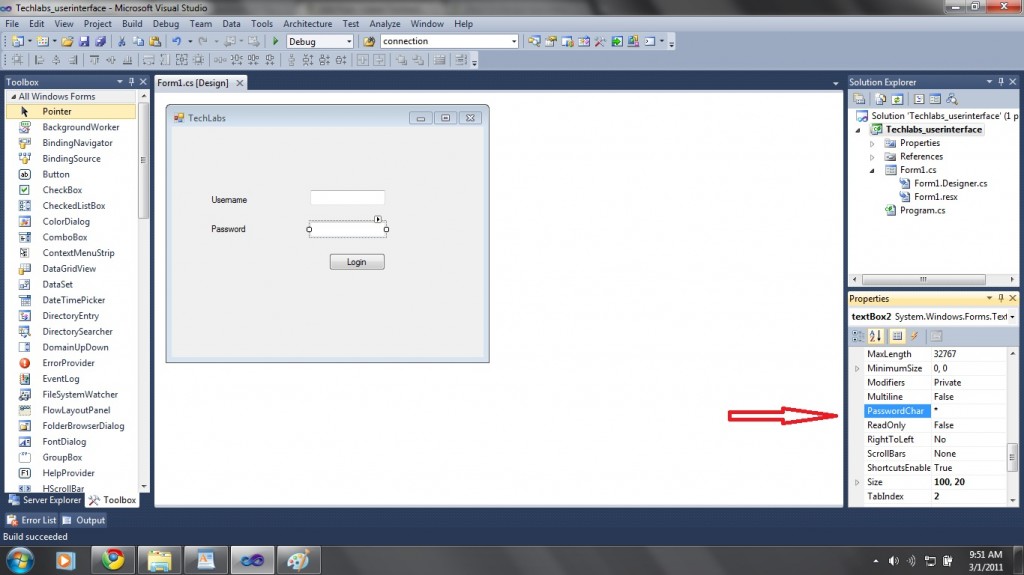
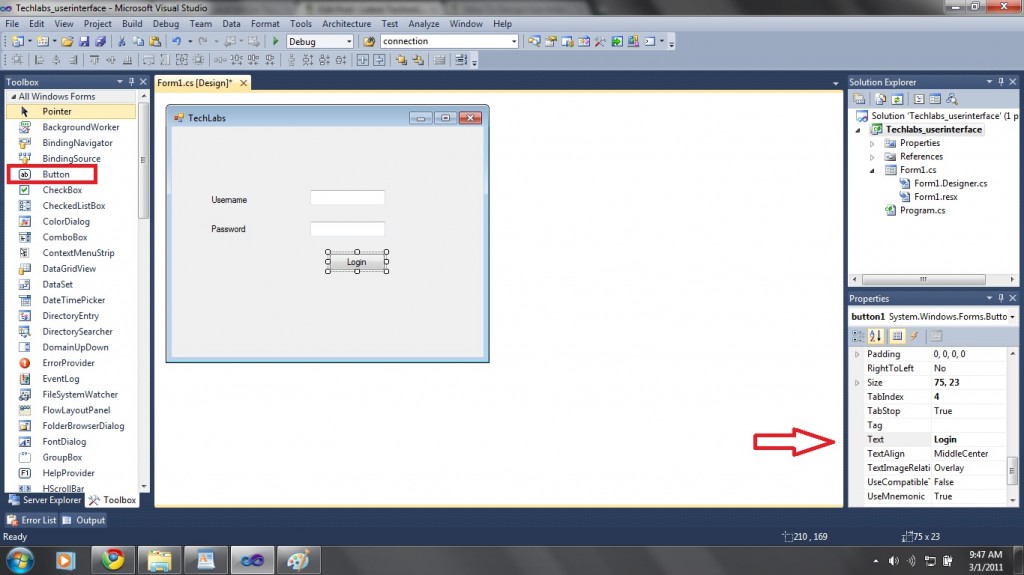
Now we will start dragging Controls from the toolbox window. I have dragged two text boxes, two labels and one button. Rename all of these by simply selecting control on form and changing Text in the properties window as shown in this screenshot.
Step 4: Adding Password Property To Text Box
Now we are designing a Login Form. We all know that when ever we type our password to some Login window then it appears as dots. We will also add this option to our lower text box. Here we go. Simply select the lower text box. Then go to the properties window and Find “Password Char”. Fill it with the desired character. I filled it with “*”. Now when you will enter password, stars will appear.
Step 5: Writing C# Code Behind Button
Now let’s start the core of the process. Double click the Login button. Here we will write some piece of code. For example I want to authenticate a user on entering:
Username= techlabs
Password= techlabsrox
Then I will write the following code.
In the above code, in first line I am comparing it with the username and password. If it is correct a pop up will appear that you have entered the correct details. Otherwise you will see an error message and both text boxes will be clear.
Resulting User Interface Design in C#

So this was a C Sharp tutorial for beginners on login user interface design in C#. In the upcoming tutorials we will learn to use other controls which will help you to design more interactive user interface in c#.
