Simulating PicLens with Flex and Away3D – Part 2
by 23 September, 2008 10:27 pm12
Step by step guide for creating a PicLens type 3D photo viewer with Flex and Away3d. This is step 2, of a 3 part tutorial that will sweep many useful techniques used in web application design, Flex, and Flash 3D design.
In the final the result will be this.
Requirements:
- Adobe Flash CS3
- Adobe Flex Builder 3
- Away3d Library (I recommend using the version I used)
- Tweener Library
- Source Files
Pre Requisites:
- Having done Part 1 of this tutorial
- Intermediate programming skills
- Moderate knowledge of AS3
- Basic Familiarity with OOP
- Basic knowledge of Flash CS3
Step 0
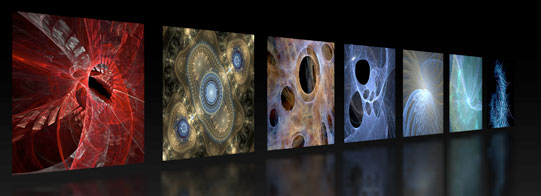
In this part we’re going to use the PhotoLoader component we designed previously, and set up the 3D scene showing multiple instances of it. Then, we’re going to develop the interactivity of the user for that scene. This will be the most intense part of the series, but hopefully the most fun.
Step 1 – Adapting the TestScene to the official scene
So, the first thing we have to do is rename our TestScene.as. Right click on the file, choose Rename and select PhotoScene as the new name. Flex should have updated the references to this class in your source, so that no errors are shown. However, you should go to the main file, “PhotoViewer3D” and rename the PhotoScene instance to “scene”, its not necessary, but its tidy. If any errors are thrown, it’s a good time to get to know the Flex Console. It is a panel at the bottom of Flex, in which errors are detected before compilation time. Its very probable that you noticed it already, just making sure. If you double click on one of the errors it shows you, Flex takes you directly to the source of that error. I really don’t know any quicker way to debug errors in Actionscript projects.
Step 2 – Multiple objects
Now, we’re going to modify the “initObjects()” method in PhotoScene to create 10 instances of PhotoLoader instead of just one, and arrange these instances horizontally. Use this code:
private function initObjects():void
{
     for(var i:uint; i<10; i++)
     {
          var photo:PhotoLoader = new PhotoLoader("imgs/testImage.jpg");
          photo.x  = i*700; <
          scene.addChild(photo);
     }
}
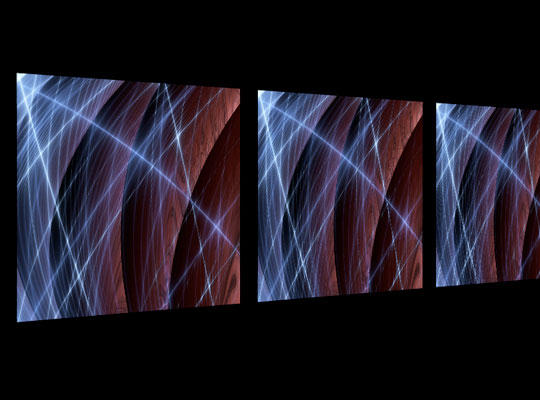
You should now see more instances to the right of the first one, even though we cant see all of them due to our limited camera control lines in the “renderScene()” method.
Step 3 – Enhancing camera controls
That’s what we’re going to do now; begin building a controller class that will provide more advanced camera user control. This part is pretty fun, since we’ve reached the level of complexity in which Away3D starts showing off its awesome capabilities.
Delete these lines in the “renderScene()” method in PhotoScene, we wont need them anymore:
camera.x = 3*(mouseX - stage.stageWidth/2);
camera.y = 3*(mouseY - stage.stageHeight/2);
camera.lookAt(new Number3D(0, 0, 0));
The new code that we will develop to achieve the enhanced camera motion will be more complex, logically, so it will not reside in our PhotoScene class. It will be in its own class, designed specifically for this, that is, camera motion control. Create a new folder next to “view” and name it “controller”. In it, create a new Actionscript Class named “CameraController”. Once done, make this class extend Sprite.
Now, back in PhotoScene.as, create a new variable named cameraController as:
private var cameraController:CameraController;
After the “initScene()” call in the “init()” method in PhotoScene, place a new call to “initCameraController()”. And lets define this as follows:
private function initCameraController():void
{
    var cube:Cube = new Cube();
    cube.width  = cube.height = cube.depth = 10;

     cube.z =  -100;

     scene.addChild(cube);

     cameraController  = new CameraController(camera, cube);

     addChild(cameraController);
Don’t worry, I’ll explain. What we did is create a small cube and added it to the scene. Then, we instantiated our new CameraController, passing it two parameters and added it to the display. Why those two parameters? And what is the purpose of that cube?! As you will fully understand later, the cube will be used as the camera’s target, the camera will constantly be “looking” at it and trying to follow it. This is a very interesting technique used in 3D, since it provides a way to simulate natural and realistic camera motion effects.
Step 4 – Building the CameraController
Great, now lets go back to the controller and shape it up a little. In PhotoScene, when we instantiated it, we passed it 2 parameters. Lets assimilate them in the constructor and store these references. We’re also going to create an init method that will be called once the instance has been added to the stage, as we’ve done before:
private var camera:Camera3D;

private var cameraTarget:Cube;

public function CameraController(camera:Camera3D,  cameraTarget:Cube)

{

     this.camera = camera;

     this.cameraTarget = cameraTarget;

     this.addEventListener(Event.ADDED_TO_STAGE, init, false, 0, true);

}

private function init(evt:Event):void

{

     this.removeEventListener(Event.ADDED_TO_STAGE, init);

}
Add a new event listener in the “init()” method to call a new “followTarget()” in enterframe.
this.addEventListener(Event.ENTER_FRAME, followTarget);
And define “followTarget()” as:
private function followTarget(evt:Event):void

{

     cameraTarget.x  += 10;

     camera.lookAt(cameraTarget.position);

}
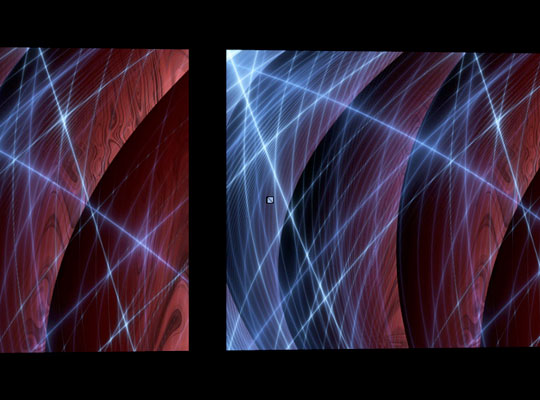
Test it out. You should be able to see the little cube starting next to the first photo and then moving to the right. The camera will look at it as it goes away. Lets extend it a bit further by telling the camera not just to look at it, but also to try to keep up with it. Add these lines to the “followTarget()” method:
var  dX:Number = cameraTarget.x - camera.x;

camera.x += dX*0.05;
Test it again… Im sure you can tell the different and understand the code with what you see.
Before we go on, delete the first line in “followTarget()” that moves the camera target to the right, it was just used for demonstration purposes. From now on, the target wont move by its own, we are going to move it.
Step 5 – Setting up interactivity
That looks good, but now lets make it more realistic, and most importantly, interactive. In PhotoScene, we are going to modify the “initObjects()” method again to register a click listener on the photos, and that method is going to call another method in the camera controller, telling it to move the camera to that photo. Don’t worry, you’ll be amazed by how simple this is going to be.
In the for loop inside of “initObjects()” in PhotoScene, add this line at the end:
photo.addOnMouseDown(photoClickHandler);
And add a couple of lines in the constructor of PhotoLoader to tell the cursor to show a hand when we roll over the photos:
this.ownCanvas = true;

this.useHandCursor = true;
Then, define the “photoClickHandler()” back in PhotoScene method as:
private function photoClickHandler(evt:MouseEvent3D):void

{

     cameraController.moveTo(evt.object.x);

}
Yes, we need to define the public “moveTo()” method in the CameraController, so lets do it:
public function moveTo(X:Number):void

{

Tweener.addTween(cameraTarget, {x:X,  time:1, transition:"easeoutexpo"});

}
It will work as long as you import the Tweener class in CameraController. Test the application and click on the images. That’s it!!
Step 6 – Setting up mouse drag
Next, the app is going to have a pretty cool feature, which is the ability of the user to click on the canvas and drag himself (the camera that is) around the scene. We’ll manage this in 3 steps, so follow along.
First, we’re going to need 2 clips that will capture the mouse down and mouse up for the dragging. One will be behind the photos, and the other above them. Besides, we will take advantage of the one behind to make the app look a bit better by using it as a background as well. Modify “initScene()” in PhotoScene like this:
private function initScene():void

{

     scene = new Scene3D();

     camera = new Camera3D();

     camera.zoom  = 10;

     camera.focus  = 200;

     camera.z =  -2000;

     background  = new Sprite();

     var mat:Matrix = new Matrix();

     mat.rotate(-Math.PI/2);

     background.graphics.beginGradientFill(GradientType.LINEAR,  [0x222222, 0x000000], [1, 1], [0, 80], mat);

     background.graphics.drawRect(0,  0, stage.stageWidth, stage.stageHeight);

     background.graphics.endFill();

     addChild(background);

     background.addEventListener(MouseEvent.MOUSE_DOWN,  handleBackgroundMouseDown);

     view = new View3D();

     view.camera  = camera;

     view.scene  = scene;

     view.x =  stage.stageWidth/2;

     view.y =  stage.stageHeight/2;

     view.clip  = new RectangleClipping(-stage.stageWidth/2,  -stage.stageHeight/2, stage.stageWidth/2, stage.stageHeight/2);

     addChild(view);

     foreground  = new Sprite();

     foreground.graphics.beginFill(0x00FF00,  0.5);

     foreground.graphics.drawRect(0,  0, stage.stageWidth, stage.stageHeight);

     foreground.graphics.endFill();

     foreground.visible  = false;

     addChild(foreground);

     foreground.addEventListener(MouseEvent.MOUSE_UP,  handleForegroundMouseUp);

     foreground.addEventListener(MouseEvent.MOUSE_OUT,  handleForegroundMouseUp);

}
And don’t forget to declare background and foreground private variables at the beginning of the class, plus import the GradientType class:
import flash.display.GradientType;
What we just did was add these two before and after the view. It was done in this order to maintain the layering we talked about before. The background is simply a sprite with a gradient, and the foreground is a semi transparent green clip above everything. Comment the 3 listener lines we’ve just added, and “foreground.visible = false” and test the app. As you can see, the sprites have been added to the display.
Now, uncomment those lines and go ahead and define the handler methods as:
private function handleBackgroundMouseDown(evt:MouseEvent):void

{

     foreground.visible  = true;

}

private function handleForegroundMouseUp(evt:MouseEvent):void

{

     foreground.visible  = false;

}
If you test the app again, you’ll see the idea behind all this. The background captures the mouse down and shows the foreground, which is simply there to capture the mouse up. Even though this might look confusing, its pretty practical. If it wasn’t there and we had set up the background to capture the mouse up, it wouldn’t work very well since we could press on the background and then, while the mouse is still pressed, move over to a photo and release the mouse once we’re there… The background wouldn’t have captured the mouse up, because the photo would have captured it. So, what we’ve just done makes sure we don’t have to worry about this kind of stuff. It’s solid, Im sure there might be other methods, but Im comfortable with this one. Before we continue, set the foreground’s draw alpha from 0.5 to 0 so we don’t see it anymore (it will do its job anyway).
Step 7 – Designing the mouse drag
We need to define the dragging now. On the handlers we’ve just created, add “cameraController.startCameraDrag();” for the mouse down handler, and “cameraController.stopCameraDrag();” for the mouse up handler. And of course, we need to define those methods in the CameraController class. These two methods will simply toggle a mouse move event listener that will continuously call a dragCamera method while the mouse is pressed:
public function startCameraDrag():void

{

lastMouseX = stage.mouseX;

     stage.addEventListener(MouseEvent.MOUSE_MOVE,  dragCamera, false, 0 , true);

}

public function stopCameraDrag():void

{

     stage.removeEventListener(MouseEvent.MOUSE_MOVE,  dragCamera);

}

private function dragCamera(evt:MouseEvent):void

{

     var dX:Number = lastMouseX - stage.mouseX;

     cameraTargetVX  += dX*0.1;

     lastMouseX  = stage.mouseX;

}
Of course, you’re going to need to define “lastMouseX” and “cameraTargetVX” as private variables at the top of the class. Make sure you set cameraTargetVX to zero when you declare it. Ill explain what’s going on shortly, I want you to see it working first…
To apply what we’ve just done, add these lines to the “followTarget()” method:
cameraTarget.x += cameraTargetVX;

cameraTargetVX *= 0.95;
And to correct incongruencies, add “cameraTargetVX = 0;” in the “moveTo()” method.
Check it out by testing the app and clicking and dragging from the background. Its simple code, with pretty impressive smooth results. So, as I said, let me explain a little now. When a drag is started, the controller stores the current mouse position and begins the continuous call to the drag method. In this method, the first thing that happens is that the stored initial mouse position is compared to the actual mouse position every time the mouse moves. This value is then used to alter “cameratargetVX” which is just a variable that represents the velocity of the camera, and the current mouse position is again stored. On the mean time, in the “followTarget()” method, the velocity variable is constantly being added to the cameraTarget’s position. This is the very basics of simulating velocity physics on programming. In this method, the velocity value is also dampened by 5% to simulate friction. Finally, the “stopCameraDrag()” method unplugs the continuous call to “dragCamera()”.
Step 8 – Adding zoom
Next, we will add a cool zoom effect, which is going to be really simple. Add this methods in Camera Controller:
private function zoomIn():void

{

     Tweener.addTween(camera,  {z:-1500, time:1, transition:"easeoutexpo"});

}

private function zoomOut():void

{

     Tweener.addTween(camera,  {z:-2000, time:1, transition:"easeoutexpo"});

}
And add a zoomIn() call in the “moveTo()” method, and a zoomOut() call in the “startCameraDrag()” method. Test the app. It’s as simple as that, we now have a little zoom effect working.
Step 9 – Containing motion
Before we finish this part of the tutorial, we need to face a little issue you might have noticed: The user can drag himself far away from the photos, and we don’t want this. We want to contain the camera in an area where the user will always see the photos.
To define the area that the user will move in, define two public variables in CameraController. They’re public because, even though we define them in CameraController, they will be filled up from the PhotoScene each time a new photo is created:
public var minX:Number = 0;

public var maxX:Number =  0;
Now go to PhotoScene and, in “initObjects()” add “cameraController.maxX = photo.x;” inside the end of for loop. This results in that each time a photo is created, the scene reports the camera controller how far the camera target should be able to move.
Now last, but not least, add this containment code to the end of “followTarget()” in cameraController:
if(cameraTarget.x  > maxX)

{

     cameraTarget.x  = maxX;

     cameraTargetVX  *= -0.5;

}

else if(cameraTarget.x < minX)

{

     cameraTarget.x  = minX;

     cameraTargetVX  *= -0.5;

}
This simply checks if the target has exceeded the limits of the scene, and if so, docks the target at one of the limits and inverts its velocity to make it “bounce”. You may enhance this code by making it consider positions before a velocity value is applied, etc. It would look better, but I wanted to keep things as simple as possible here.
And that does it for part 2 of the tutorial… To wrap things up go to PhotoScene and add “cube.visible = false;” in “initCameraController()” so that the little cube is hidden from the user.
Next
On part 3 we will give the application a closure by centralizing arbitrary variables, enhancing graphics a bit, and connecting it to an external XML that will indicate it what images to load.
